|
Nice little infographic from Beprepared.com
Please include attribution to beprepared.com with this graphic. Articles Here I will be posting articles about a variety of crafts, projects, how-tos, etc, as I research them and try to do them, lol. I may also repost articles found on other websites with the owner's permission, and I will always add a link to the original page if possible. If you see something that belongs to you, and you did not give your permission for it to be used, please let me know so that I can remove it or get your permission. I don't want to steal!!!
Everyday Carry
As I spoke the other day in my blog, I carry a bookbag rather than a purse when I go to work. I find it stresses my shoulders less as the weight is balanced, and the size lets me bring everything I need each night. So what do I carry with me? Here’s a list:
Party food!
I have decided to give out my secrets for the party food that we had this weekend, seeings as Halloween is still coming up, and others will be having parties too. For the Goblin Gruel, I know, we didn't get a pic of it before it was eaten, sorry, I used 2 cans each of Cream of Potato soup, Cream of Celery soup, and Cream of Chicken soup. Then I added 4 cans worth of milk, diced potatoes, a can of peas, 2 cans whole sweet corn, and 2 cans chunk chicken pieces. Warmed everything up, and it was delicious! For the Bloody popcorn, we air popped a large bucket of regular popcorn, and I melted some butter and red food coloring together, then sprinkled that throughout while the popcorn popped, and topped with salt. Pretty simple, and there was plenty left over for the movie day and D&D on Sunday! The Zombie Crips were also easy, just a package each of Spinach and Sun dried Tomato tortillas cut into sections, laid on a cookie sheet and sprayed with butter flavor nonstick cooking spray and sprinkled with salt, then baked at 350 degrees for 5 minutes. Last year we used cookie cutters to cut out fun Halloween shapes before we baked them, but I didn't have the time this year, sadly. For the Cauldron Cakes, I started with a red velvet cake mix, and followed the directions on the box. I always mix my oil, eggs, and water together separately first, so that I don't over mix the batter, since that always makes the cake light and fluffier if I leave a little of the dry mix unmixed. I also added about a two teaspoons of caramel flavoring to the water/oil mix before adding it to my dry stuff, and the result was awesome! Baked it at 350 for 18 minutes, and left them cool for about 30 minutes. Then I opened a package of creamy vanilla frosting, and whipped it with a fork for about 5 minutes until it was light and airy. Don't waste money buying pre-whipped frosting, you are buying air. One can of creamy frosting will cover 24 cupcakes without a problem if you take 5-8 minutes whipping it yourself. After the cupcakes were frosted with white, I took red gel frosting and made the blood drips. Then I added the sugar knives me and Dale found at Wal-Mart, and they were done! Light, moist, and evilly delicious! I made the Witches Brew, or it is also known as Blood Clot Punch, by mixing up some fruit punch drink mix with water and sugar, then made the “Ice cubes” by mixing cherry and orange Jello together and freezing it in Halloween ice cube trays we found last year at Dollar Tree. The remaining Jello mix was put in the fridge to firm up, and then I used a fork to stir it up and rip it into pieces before adding it to the punch with some Sprite from Dollar Tree as well. Very yummy! The Apple Spider I made with some apple cider packets from Wal-Mart as well, and I just mixed the amount of water and drink mix in the Crockpot, and it stayed nice and hot, and Dale loves to mix in a spoonful of caramel dip in his cup when he drinks it. Add a bag of mixed candy, and there you have it! Blessed Be! New bug out bag
Well, we went to Wal-Mart early this morning, and as we were walking past the camping section, I had to stop and look around. This has to be one of my favorite things to do ever, even if I don't buy anything new. I like to go around the store, and the Dollar Tree store across the street, and see what things are in the different sections, and see what use I could make of them in a survival scenario. From finding survival food in the regular grocery aisles to looking over supplies to add to my first aide kit, it keeps my mind active and engaged. However, today was special. As Dale and I were walking up the aisle, I saw a beautiful bag, all by itself, hanging on the end cap. New stock was being put up, and this was one of the items. The Fieldline Tactical bag. It was gorgeous. We started to open the different sections, and I started to read the tag that came with it, and fell in love. It has two (2) very large compartments with multiple pockets to organize your gear, plus a compartment for a 2 liter camel-back hydration bladder with straps and an exit hole on either side of the handle for the hose to pulled through, a middle compartment between the two main ones with compression straps to carry equipment, and side pockets. It also has a fleece lined electronics pocket to protect your phone/sunglasses. There are pockets inside of pockets! The carrying straps are very wide and comfortable, and the sternum strap was adjustable as to where it sat, so I could move it up over my chest and still be balanced. And the whole bag is covered in strap loops to carry even more stuff on the outside, including the waist belt. All the stitching is triple stitched, and the canvas is in double layers in some areas, to provide even more stability. The webbing is high quality, and there are even loops on the under side of the bag to attach a bed roll, next to the dual grommeted drainage holes! And all for $40. Well, needless to say, we bought it, and we might be buying another one as well, for me. We already had 2 bags at home, one an old pack from the army surplus store, and one a hiking backpack we picked up on clearance from, you guessed it, Wal-Mart. The army surplus pack is very heavy even when empty, and while it balances good, the shoulder straps are narrower, and it is not as comfortable to wear. So we took all our bug out supplies from both bags out and redivided them up a bit more equally, according to our skill sets. After we got it loaded, we both tried on the Fieldline, and the balance was almost perfect. After we adjusted the straps correctly for Dale, it felt like he wasn't even carrying anything, except where it rested on his hips and shoulders. So I tested it out, and after adjusting the straps again, it was the same. All the weight was equalized over the pack, and it felt great. So I have to say, we are pretty happy with the purchase, and will be trying it out when camping hopefully before winter, but we will take it out on our night walks around the block, regardless. And we have decided to use the old army pack as our vehicle bag, and will be getting it stocked with stuff specially for the van. We are considering getting another of the Fieldline bag for me, since the hiking backpack only has one large compartments with no organizing pockets, but that will have to wait for a while. We might find something even better, which would not hurt my feelings, but right now, we are feeling pretty good. Blessed Be Excess
I was watching HGTV today, one of the fail proof channels that always has something interesting for me to watch, and a show came on, Million Dollar Rooms. As I watched the show, I tried to keep an open mind, but one thing kept running through my head: I wish I had that kind of money to spend on anything, let alone just one room in my house. All 3 houses they showed had multimillion living spaces, which, with the cost of just one, would get us our farm, build our houses, buy our animals and systems, and still leave us with plenty to live off of for a long time. Now, I'm not saying any of this with bitter or sarcastic tones, I'm just being realistic. I can't be jealous of the people who live in these homes, because they have probably worked hard to have what money they have, either in a family business they have helped continue, or building their own, but it got me thinking what I could do with that much money. Everyone wants a beautiful home they can be proud of, and I'm no exception. A three bedroom Earthshjp with a good sized kitchen/dinning room, and a large living area with a studio right off from it would be ideal, and it is something we could build in a couple of years time, once we have everything set up to go. So I may not have millions to spend without regards to other responsibilities, but we are working towards taking that first step to having the house of our dreams Blessed Be Credit cards
I have a confession to make. I do not own a credit card. In fact, I have never owned a credit card. And I never intend to own a credit card, now that I am building credit in a different way. And let me tell you why. When I was growing up, my mom never hid bill paying from me or my brother. In fact, paying bills is how she taught us basic math skills, such as addition and subtraction, and time keeping with the due dates, as well as spending quality time with us. Mom would sit down with her check book, pay stub, the bills, and the calendar, and we would go over how much money she had, which bills were due before her next paycheck, and she would show us how to add her pay into the bank statement, and subtract the bills from it afterwards. She taught us the importance of paying bills on time, so we would not be charged late fees, of keeping track of how much money was spent each day on little purchases, and to plan a budget so that we had all the bills paid, as well as money to eat on and to pay for us to go to school.
I learned very early that credit cards were not the magical cure to all our wants and needs. As I grew older, I learned of Mom's struggle with getting credit card debt paid off, which she is still working on today, and so when all the letters starting arriving in the mail when I turned 17 and 18, showing me all the perks of having a credit card, how many rewards I would get after spending such and such amount, I cut them up. I did not have a good job to pay back any money I spent with a credit card, and Mom's budget didn't have any room for it. And when Mom asked me why I cut them up, I said, "I may have a job at McDonalds, but that is paying for me to go to school. If I want something, I can wait and save up for it. I don't want to fall into a trap that I will spend the rest of my life getting out of." Most people will say that having a credit card builds credit, and you can't get by in this world without a good credit history. And I agree, to a point. Credit cards are a great way to build credit if you use them right, but I didn't feel the need to have the temptation to just go and buy something I had no way of ensuring I could pay off later. And it is true that I have been hurt by the fact that I have no credit history. When my husband and I tried to get the van that we have now, we were not able to put the loan for it in my name, or even have my name on it at all, because I did not have a credit history. And we were not able to get a loan for buying a house, because I do not have a credit history. However, we have a 2 year lease for a reason. After speaking with the bank about getting a loan, they required at least 2 years of non-traditional credit, to show my ability to pay on time. What that means, is I needed to have at least 48 months of paper showing that I paid bills on time, with at least 3 different bills. The car payment didn't count, since it is in Dale's name, so we took a 2 year lease on the house we are in now, as well as put all the bills in my name. Mom still helps pay the bills, since we are all still living together, but with all 7 bills in my name, with the purpose of building credit, I have no reason to get a credit card. Plus, with a 2 year lease, we are able to have more time to save up a down payment for when we really do get a loan. Blessed Be! Mabon
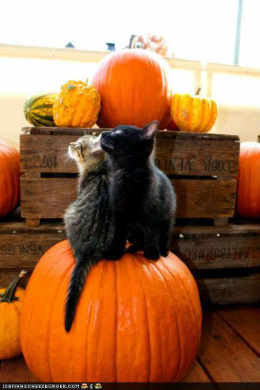
Mabon is the second harvest festival of the year. Traditionally it is the time of year when the gourds and melons, as well as the last of the grain, is harvested. After the height of Midsummer glory, and after the cutting of the first sheaf of Wheat at Lammas symbolizing the Gods decline into death and the underworld, Mabon is a celebration of the abundance we are reaping after a summer of work. It is the Fall Equinox, one of the two times in the year where light and darkness are completely equal, before we continue on our journey into winter and the path to rebirth. Altar decorations include gourds and melons from the garden, a straw man and corn dolly to represent the God and Goddess, pressed leaved and any nuts that have been gathered before the squirrels have gotten to them!
Blessed Be! Foot Stool
Mom's foot stool was made with the same 3/4" fiber board and driftwood that we used on the cat tree. We ripped a foot long piece of driftwood down the center for the base of the legs, and then went over to my Uncle Dean's house and used his drill press and router bits to carve out a section for the legs to sit in evenly. After we returned home, we cut the legs, filled the cracks with glue, and sanded the bottoms and edges of the bases smooth. The next day, while I worked, Dale drilled and glued the legs to the bases, and then to the top, leaving it to dry overnight. The next morning, we took wood stain that we found in the shed, and applied three coats to the legs, and two to the top. As soon as I get the cushion done, in matching fabric to the ones I already made for the rocking chair, it will be done. Blessed Be! Cat Tree
We started out with a basic cat tree that my Mom had bought many years ago for our other cat, Butt. Since Butt didn't use the tree anymore, we decided that our kittens, Spaz and Phantom, could use it. Well, as they are getting older, aka: BIGGER, we thought that it would be nice to get them a cat tree that would be big enough for them when they became adults. Plus, we needed to get the cat food dish out of our room, since they can be messy eaters, lol. So we started looking around. All of the trees we found were way out of our price range, and they were very basic, so we decided to build our own with the drift wood we had gathered last summer. Realizing that we didn't have enough flat boards to make the kind of tree that we wanted, we skipped on over to the lumber yard and asked if they had any scrap that we could use. We got a few lengths of 3/4" particle board, which is very strong, much to my surprise, and a 2 X 1 1/2 foot piece of plywood, all for free! Thank you lumber yard!!!! So back home we skipped, to gather the rest of our supplies. Wood glue, staple gun, screws, hand saw, power drill, the long piece of plywood Dale found in the shed, the driftwood, twine, level, pencils, square, and hand screwdrivers rounded out the project list. So flying by the seat of our pants, we dove in. As a side note, I had taken wood shop in in both my years of middle school, and Dale had taken it in both middle school and high school, so we did have some basic idea as to what we were doing. But flying by the seat of your pants can be fun, if you're not too fussy about how things look, which, when using driftwood, you really can't be anyways, lol. So we picked through the pieces of driftwood, and finding a thick one, we stood it up until we were happy with the angle, and then eyeballing and using a level, I drew the line on which to cut. So down in went, over the edge of the porch, and while I braced the wood, Dale started sawing. I know, a proper wood shop would have been helpful, but it isn't critical if you have some help. Plus, it is a great upper body work out. Needless to say, there was much laughter and many groans when we cut a piece wrong, but no major mistakes were made. We also took turns sawing. Once the piece was cut flat, we were then able to measure and mark the next line, where we were going to put the walk way, and then the next, for the top tier. And so it went with that piece of wood, and then we marked and leveled the support post for the walkway. Once those two pieces were cut, we attached them to the base with wood glue and screws. Then we attached the walkway, and put the top post back on, screwing through the walkway into the bottom driftwood post. Around this time, our power drill started to give out, so we ended up hand turning the screws the rest of the way in. It would go about halfway, then stop, even when it was fully charged, so I have no idea what is wrong with it. Another side note, get really good quality screw drivers....we stripped out several during this project. So we took a short break, and then went back to cutting more driftwood. The last two posts went quickly, except where we had to cut at an angle on the piece serving as the ramp, and we got those attached and glued. Then we screwed on the tiers and the little lip on the top one to hold the food dish, and then took the whole thing inside to finish screwing in the screws since it had gotten dark and the bugs were eating me alive. While Dale was fighting with the screws, I wrapped the twine around the upper post and under the walkway, to give it some extra support, and then down the ramp to give the kittens somewhere to climb. Then, since it was the middle of the night, I was out of staples, and I had to work the next day, we called it quits and went to bed. The day after, I wanted to cover the tree, but I didn't have any fabric with enough pile to make any difference in the softness. Then Mom said we should go to the carpet store and ask if they had any remnants that they could give us. So we went, and the only remnants they had were little ones for sale, but the clerk we talked to told us that they had just thrown out a large amount of sample boards, and as long as we were neat, we could drive around and pick out want we wanted. We had a blast, and I got enough carpet to last me several more projects! But, since it had rained all day, we spent the evening and night air drying the pieces with a hair dryer, which is the incarnation of evil.....at least, that's what Spaz thinks. So the next morning we hot-glued and tacked the carpet down with short nails, but since we didn't have any staples left for the staple gun, I had to wait til today before adding their toys. But today, I took some suede straps I have, once more, left over from another project, tied a jingle ball to one, sewed a fabric mouse to another, both toys the cats already had, and stapled/tied the straps to the wood. So now everything is complete. We took Butts little apartment, and turned it into a palace, lol. Blessed Be! |
